
St Omer also brings to the table two new dishes, a cruciform motif in the north axis (prefiguring the symbolist maze designs of Randall Coate and Adrian Fisher), and a simple striking contrast between its 3x3 square centre, and a 1x1 area of ‘inaccessible space’ met at entry (the latter a strong lure for metaphorical readings, within a religious context, between the roles of Church/God and individual walker).

But it’s also a very personable pattern. I have fond memories, as a boy decades ago, of tracing it carefully on greaseproof paper as a ‘keeper’ from Janet Bord’s magical Mazes and Labyrinths of the World, which appeared like a nonchalant Grail once in the town library. Three years before Bord’s book, it had popped up in 1973’s Theatre of Blood as wall-art backdrop for Vincent Price’s wordy suicide, and its earlier iconic hold is further evinced in its being copied or adapted multiple times, from Ghent’s 1533 installation, to five more St Omeresques layings in the 19th Century labyrinth revival [Saward, 2003, 104, 117].
A further allure for the pattern today is that it’s paper-based. Within the corpus of historical labyrinths, St Omer is ‘the one you’ll never walk’; whilst unicursal and arising from a legitimate labyrinth tradition, its pattern is too fiddly – too angular – too much, to be recreated at the retreat centre or beach event.(1)
I wished to make it more accessible, and upon studying compression diagrams for the other medieval labyrinths, wondered - could a compression diagram be made of such a design, a circular St Omer? Rather than squaring the circle, could we make a circle of this square?
The initial process proved straightforward though laborious:
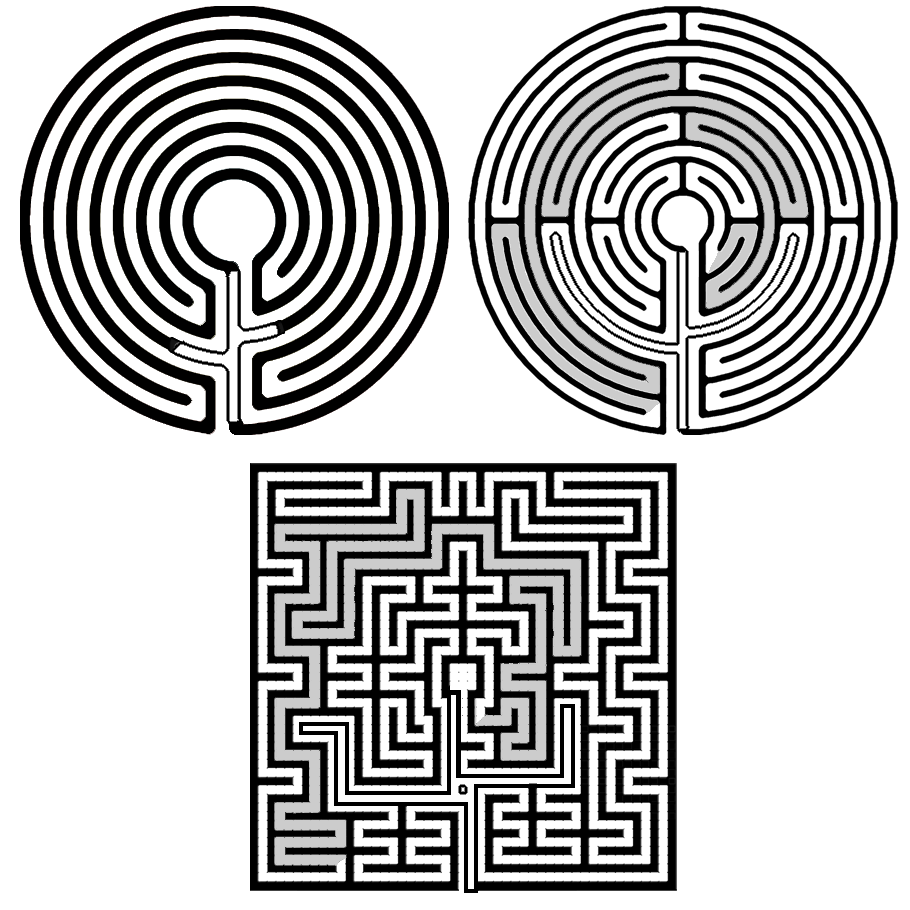
- On one page, make a copy of St Omer’s pattern, and divide this diagonally to create four zones each containing a cardinal axis and neighbourhood of pathways.
- unbroken 360° sweeps of motion around its circuits, and
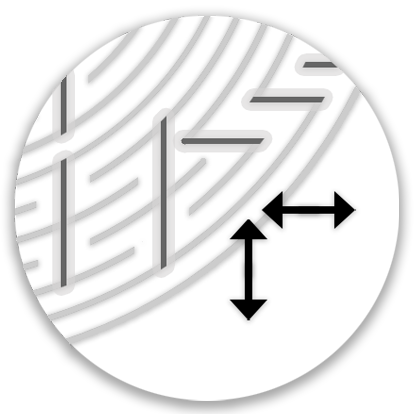
- Count the walls (black tiles) from centre to periphery, and include both in your total (i.e., 12).
- On a second page, draw around a central space 12 concentric circles.
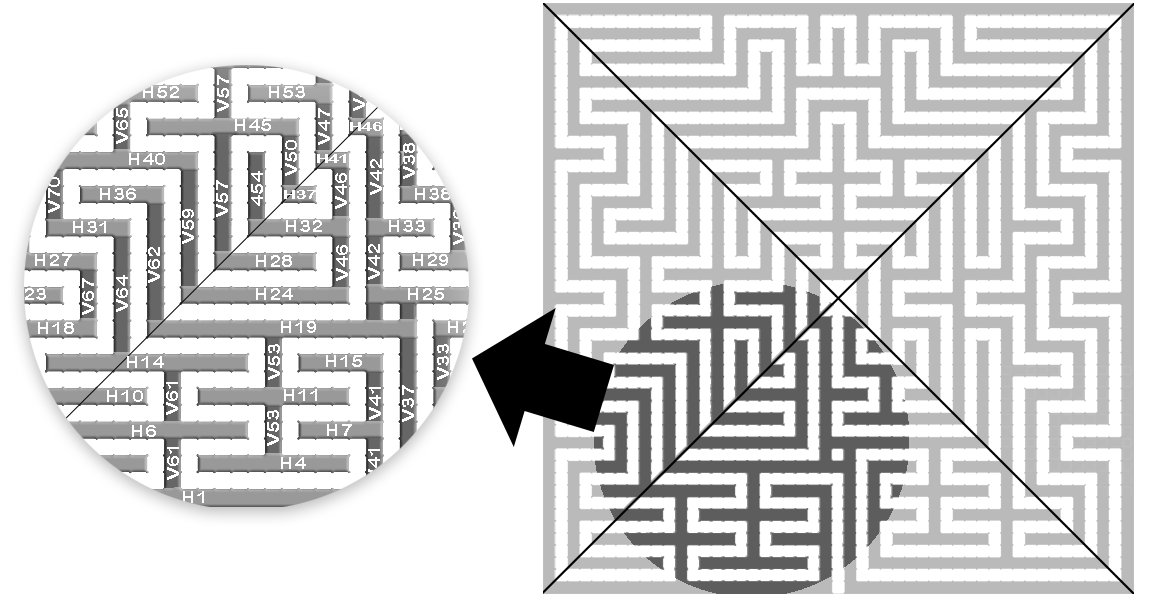
- Divide this circular design diagonally, to create equivalent directional zones to the square’s (see Fig 3).
- Number every horizontal (Hn) and vertical (Vn) wall in the square original (see Fig 3).
- Transpose each Hn and Vn in the square design, into its circular zone.
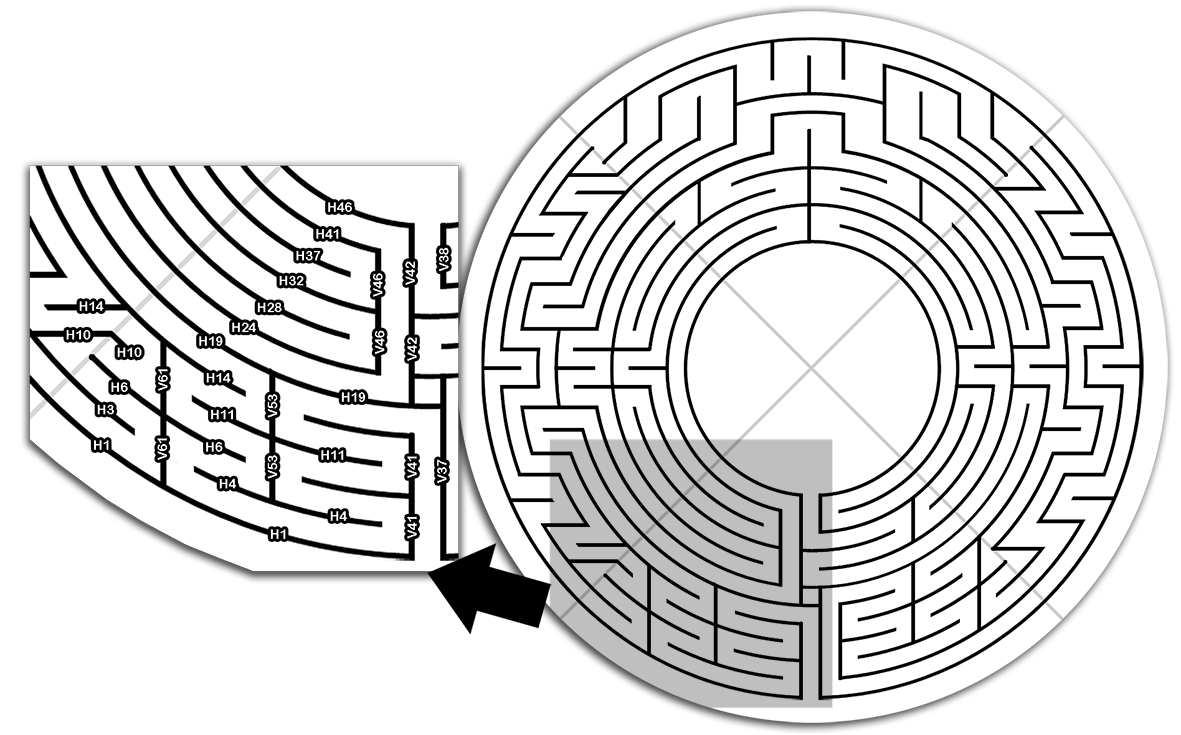
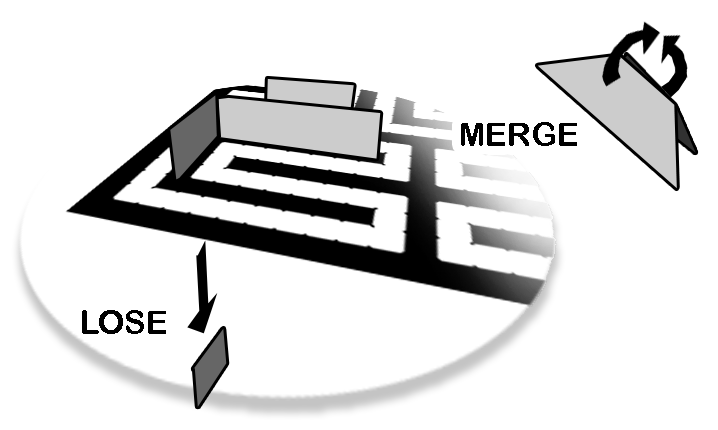
During step 6, peculiar geometrical qualities emerged: in the circular labyrinth’s four corners, Hn and Vn elements (walls) very occasionally disappeared or merged (Fig 5). Given that this occurred approximately where bastions arise in historical labyrinths(2), I wondered if such bastions pointed to areas of ‘strange properties’ known to medieval scribes and masons but lost to ourselves; if bastions are a sly geometrical tap of the nose across the centuries to us (cue Twilight Zone music here), pointing us at curious spots within the labyrinth to metaphysically explore?
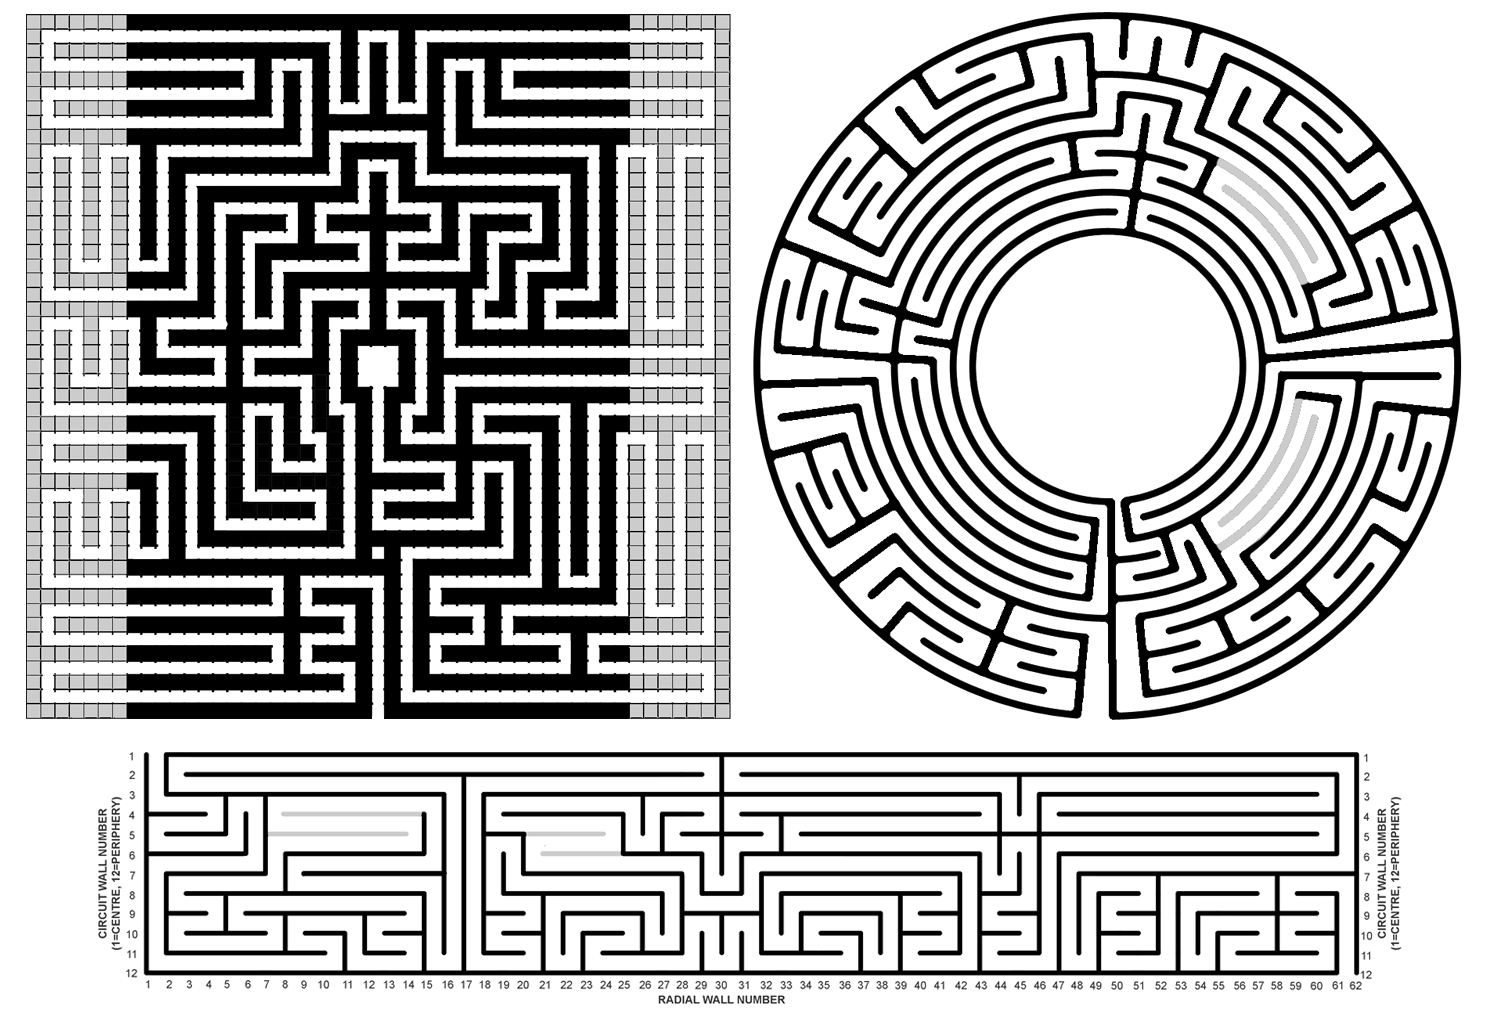
Well, no. The next day, with fresh coffee, this appeared as ridiculous as it sounds. St Omer of course is chronologically later than the other bastioned pavement labyrinths mentioned; but more essentially, any Tetris-play within corner walls was arising from my choosing too small a centre-circle. I’d gone for a roughly Chartres-y size, but experimentation with larger centres (which provide bigger circuits, like tree rings, around them) permitted Hn and Vn elements to map fully across from square to circle. In Fig 4 you see the centre size chosen; though occasional instances where H became V in transposition (or vice versa) in those corners can still arise, this is the logical outcome of rebuilding a two-directional plane of straight lines, into one where one of its directions curves.(3)
At this point, now, we could now create a compression diagram – but I had one more aspect I wished to tidy. Like tectonic plates, the horizontal and vertical path directions in the corners clash to throw up jagged lines (Fig 6). A solution to this is to abandon orientation based on cardinal axes, and instead treat all of the circular pattern’s axes as equal and radial. This means, instead of following standard Roman and Medieval Labyrinth adherence to the compass directions (i.e. paths leading across the ‘tree rings’ formed by circuits must run either in a left/right or up/down motion), we can treat each instance of such circuit-crossing motion as lying on one of many axes radiating out from centre to periphery. Thus each H or V element, if it moves us towards or away from the centre of the pattern (not simply pushing us around the tree rings) requires either its own radial axis, or to share one if one already exists there for another element.
From here, we simply
- Within the former circular labyrinth created in steps 1-6, count all the potential radials: every instance where movement up or down between circuits arises. I make this 71 (refer to St Omer compression diagram, Fig 7).
- Now – deep breath – repeat step 2. Redraw 12 concentric circles around a centre-space (probably bigger than your first attempt, to get a ‘best fit’ centre diameter so H and V elements can transpose better).
- Divide 360 by 70 (i.e., by your total of radial axes needed minus one). We’ll treat the south axis as a single unbroken radial line, entrance to centre, thus it acts as both axis 1 and 71 from your count of radials, and so we only need 70 individual axes. (Note I’m ignoring the single square of ‘inaccessible space’ from the square St Omer for simplicity; but if you want to add these in, knock yourself out.)
- Then, with a protractor (or Photoshop!), create the number of radial lines you need, running from the central point to the periphery. In this case, we need a radial every 5.373° (or a star polygon with 70 sides).
- Transpose your H and V walls onto the pattern, zone after zone.
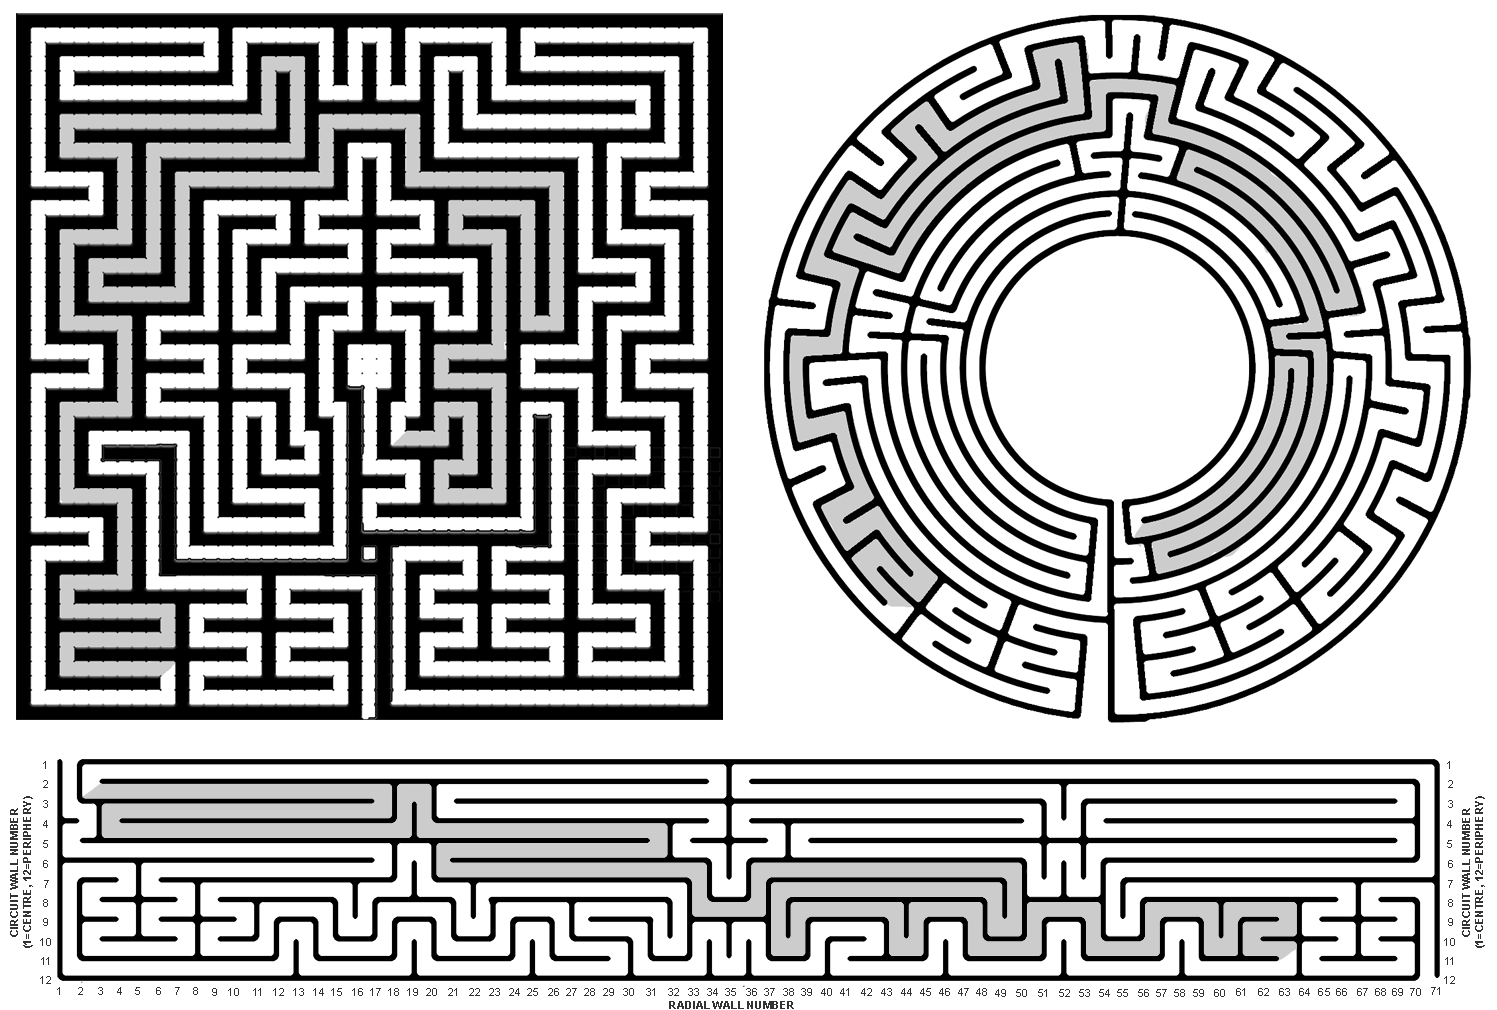
Finally we have (Fig 7) a circular version of St Omer, with ‘tectonic corners’ calmed, and we can also create a compression diagram.(4) I tested the same with Ghent’s similar pattern as well, below (Fig 8).(5)
So finally, we have circular versions of these labyrinths. Does this make them any easier to lay out, say with flour or etched onto a beach, and does the circular format make them more relaxing for walking by avowed haters of straight lines? I would note that however you lay out St Omer’s pattern, it’s not going to be easy; there’s no quick seed pattern to the rescue here. But with a compression diagram, the pattern becomes more portable – and I certainly am looking forward to trying these out, full-size, in the near future and getting public feedback!
Works cited:
- Bord, Janet. Mazes and Labyrinths of the World. Latimer. 1976.
- Kern, Hermann. Saward, J; Ferré, R (trans). Through the Labyrinth: Designs and Meanings over 5000 Years. Prestel. 2000.
- Saward, Jeff. Labyrinths and Mazes: A Complete Guide to Magical Paths of the World. Gaia. 2003.
- Steafel, Thorn. Labyrinth Magic with the Chartres Labyrinth. Aemaerax. 2022.
Footnotes:
- That it was intended to be walked when made is confirmed by Wallet (1843), first recorder of the pattern after the fluke discovery of the sketched destroyed labyrinth from an anonymous local student in the late 18th Century; Wallet notes that elderly local residents recalled the labyrinth’s placement in the church and that disturbance by ‘children and strangers’ walking it during mass led to its destruction (Wallet, 98). From stated dimensions the path was about 22cm wide(Wallet, 102; Kern, 2000, 162).
- E.g. Genainville and Reims, plus 16th Century woodcuts in gardening books by Guillaume de la Perrière and Thomas Hill.
- Even here, the centre-size remained compromised as used in Figs 4 and 7. The north zone (as defined within pattern-wide diagonal lines) has less activity to accommodate, than the other three zones; it could be served by a smaller centre than that required by the remaining zones. This problem becomes more pronounced in Ghent’s pattern in Fig 8.
- Indeed you may prefer to make the compression diagram before the circular labyrinth, if confident in both. The basics of compression diagrams are nicely laid out in Saward, 2003, 92-93; also a step-by-step guide is in Steafel, 2022, 66-69.
- As Ghent’s labyrinth was built as an oblong (41x49 tiles), to gain square format I added four ‘filler columns’ to make a 49x49 square pattern; filler shown as grey tiles in Fig 8. Ghent’s pattern permits expansion to 49x49, but shrinking it to 41x41 is not an option.